Recently, many customers and partners have been asking us what solutions can inter-operate with their Citrix products, not only as an IoT platform, but also for workflow automation.
The good news is that Microsoft Azure has some fantastic services that can be used to do exactly this. Microsoft Logic Apps can be used for workflow automation which can easily be combined with other Azure services such as IoTHub (stay tuned for future posts!)
To make it even more exciting, Logic Apps can easily be integrated with the Citrix Ready workspace hub to create powerful solutions.
How it Works:
The workspace hub contains two workflow triggers that can be configured by the admin or the user. These triggers are automatically set off when you connect to or disconnect from the hub.
In other words, when you cast your session to the hub or launch your session via proximity roaming, the connect workflow URL that you have specified will instantly be triggered.
When you take your casted session back or walk away from the hub to cause a session disconnect, your disconnect workflow URL will be triggered.
Let’s dive deeper into an example to see how this really works.
Example Overview:
For this example, we are going to trigger an Azure Logic App which posts a message to a Slack channel when you connect/disconnect from your workspace hub.
What You Will Need:
- An NComputing or ViewSonic Citrix Ready workspace hub
- A subscription to Microsoft Azure (there is a free trial!)
- An Android device with BLE 4.0
- The latest version of Citrix Receiver downloaded from the Google Play store.
- A Slack instance
Step One: Understanding the Data
When your Logic app is triggered by the workspace hub’s connect or disconnect events, JSON data is automatically sent up to your workflow by default. The data will look something like this:
{
   "hubguid":"adb97319-6a77-447f-9e62-91ba76ae2596",
   "friendlyname":"Rachelle's Hub",
   "event": "connect"
}
Where hubguid is a unique identifier of your hub, friendlyname is the friendly name of your hub (defaulted to the hostname), and event is either connect or disconnect.
Step Two: Create your Azure Logic App
Now for the fun part: let’s start building! You can choose to build your own or to import the one from this sample.
NOTE: If you decide to build your own, make sure to start your Logic App with the trigger that reads “When an HTTP request is received”. This will generate the HTTP POST URL that you will need in future steps.
-
Log into the Azure Portal
-
Search for Logic apps
-
Choose to Add a new one

 How to Import the Sample Logic App
- Copy the JSON template from here
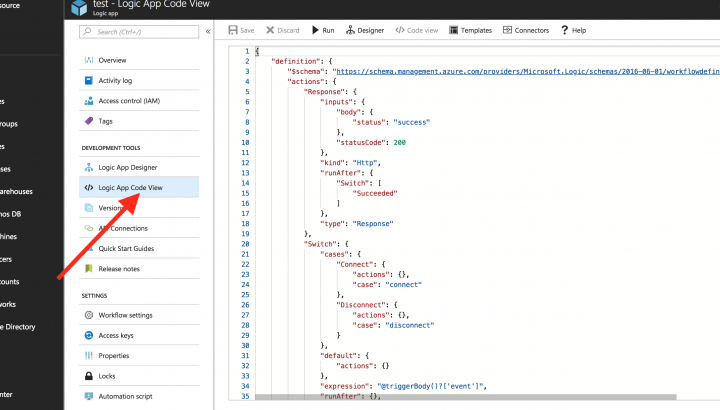
- Open the Logic App that you just created and navigate to Logic App Code View
- Paste the copied JSON into the editor

How to Add the Slack API Connection
Next, you will need to add your Slack connection to the workflow.
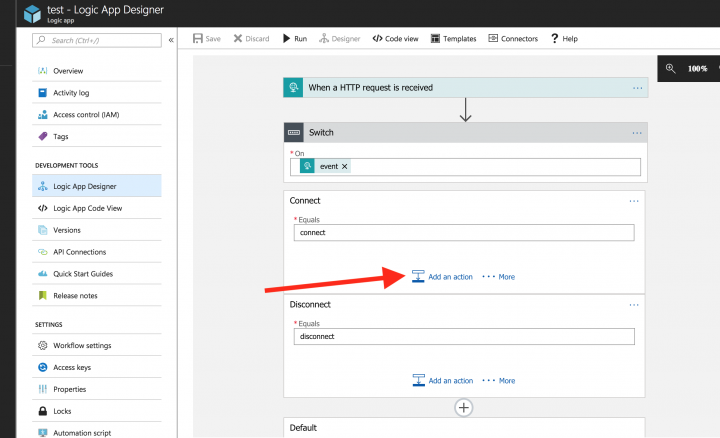
- Navigate to Logic App Designer
- Click on the Connect node
- Click on “Add an action”

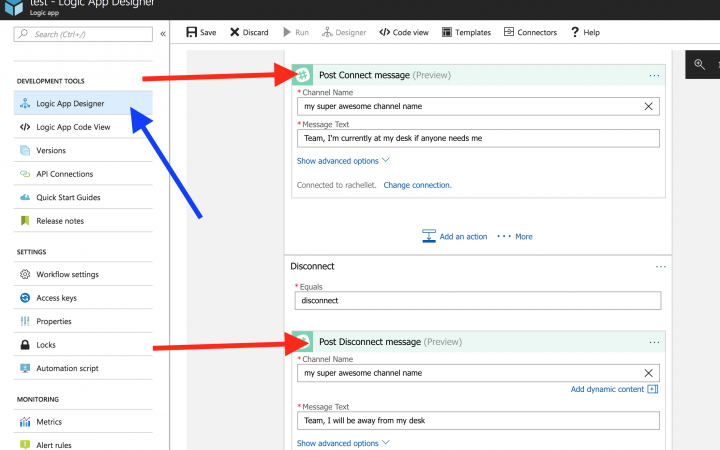
- Search for and select “Slack post message”
- Connect your account to your Slack instance by signing in and authorizing

- Enter the channel name of where you want to post your message to
- Enter text for your message
- By default, the message will post as a bot. To post the message as yourself, click advanced options and change “Post as User” to “Yes”
- Repeat the above steps for the Disconnect node.
- Click save and you should be good to go!

The Sample Explained
The sample Logic App that I provided gets triggered when an HTTP POST request is received. I then use a switch case to decide if this was a connect or disconnect event. If it is a connect event, I post a message to my Slack channel, letting my team know that I am currently at my desk and available.
If it is a disconnect, I post a message to my Slack channel making my teammates aware that I am no longer at my desk. This is done by using the Slack connector and linking my account.
Step Three: Get the HTTP POST URL
In this step we will get the generated HTTP POST URL that we will need in Step Four.
- Navigate to your Logic App Designer
- Select the first connector “When an HTTP Request is Received”
- Copy the generated HTTP POST URL

Step Four: Connect your workspace hub to Your Logic App
To configure your hub to trigger your logic app:
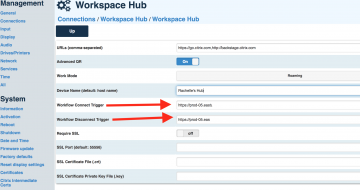
- Navigate to http://<ipaddress_of_your_hub> in any browser to access your hub’s System Configuration.
- Go into Connections -> Edit workspace hub -> workspace hub.
- Paste the POST URL that you copied from Step Three under the Workflow Connect Trigger and Workflow Disconnect Trigger form fields.
- Click Save and reboot your workspace hub.

Note: Cloud-based UEM allows admins to push out these configurations to fleets of devices.
Step Five: Test Your Integration
In this last step you get to finally see your solution in action! We will be using proximity to test the integration, but you will get the same results when you use casting.
- Log into Android Receiver on your mobile device.
- Make sure that you have the workspace hub setting enabled. If not, go into settings and enable workspace hub. Be sure to configure an app or desktop to launch.
- Place your mobile device close to your workspace hub.
In just a few seconds, your session will launch on the hub and your Logic app will be triggered. Check your Slack channel to see if your message successfully posted.
Now, walk away from your hub or swipe down on the screen with two fingers. Your session will disconnect, and your Logic app will be triggered again and post your disconnect message to Slack.

That’s a wrap! Let us know in the comments if you have any questions or run into any obstacles. Also, feel free to contact me via Twitter @RachelleTobkes and let me know what future samples you’d like to see related to the workspace hub. 🙂


