Citrix XenMobile NetScaler Connector unifies the best of XenMobile MDM and NetScaler when it comes to delivering emails through a native mail client.
For a standard deployment scenario that uses native mail client, EAS server is exposed to the outside world, jeopardizing the security of sensitive data. XNC allows an admin to control access to corporate email, calendar and contacts from mobile devices based on compliance policies that are set on XDM, while leveraging the optimization and security provided by NetScaler (here acting as a reverse proxy); with a seamless user experience. This allows organizations to have internal-only Exchange access with the ability to use a device’s native mail client with rule-based allow/deny modes.
Here is a step-by-step document to help setup a XNC environment for demo purpose, presuming the fact that the XMS environment is already load balanced. You can add policies as desired when you move the environment to production.
Pre-Requisites
1) XNC Sever
- Install XNC server on a windows machine
- Ensure .Net Framework 3.5 is installed before the XenMobile Netscaler Connector is installed
2) Netscaler
- An IP for the Exchange Active Sync LB VIP
- SSL Certificate for communication with the exchange server
- Exchange IP Address details
- XNC IP Address details
3) DNS Records
- Create a DNS record for XMS
- Create a DNS record for the Exchange Active Sync LB VIP
Recommendation
1) XMS server
- Complete the initial setup
- Make sure you have the SSL listener certificate imported and installed on the XMS server
- Make sure you have the server certificate imported and installed on the XMS server
1. XNC Installation
|
Step |
|
| 1 |
Download the XenMobile Netscaler connector from the Citrix website |
| 2 | (Note: Please ensure the .Net Framework 3.5 is installed before installing the XenMobile Netscaler Connector)
Run the XNC setup wizard and Click Next |
| 3 |
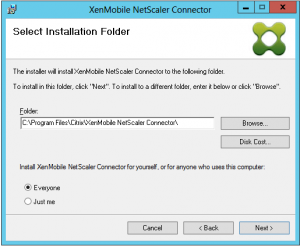
Browse the desired installation path Click Next |
| 4 |
Click Next |
| 5 | Select “I Agree” and Click Next on the license agreement window |
| 6 |
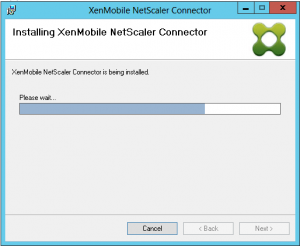
The installation process will commence |
| 7 |
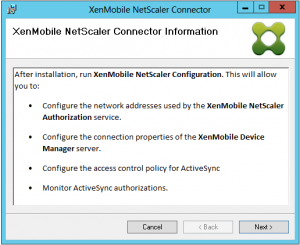
Click Next on the XenMobile Netscaler Connector Information window |
| 8 |
Click Close |
2. XNC Setup
|
Step |
|
| 1 | Launch the XNC icon from the desktop
Under Web Service tab
(Message displayed: XenMobile NetScaler Connector Service started successfully) |
| 2 |
|
| 3 |
An Information popup window stating that the “XenMobile Configuration Service” must be started. An Information popup window stating that the “XenMobile Notification Service” must be started. Click OK |
| 4 | Go to Windows Start – Run and type services.msc, Hit Enter
Right click XenMobile Configuration Service and start the service Right click XenMobile Notification Service and start the service
|
| 5 | Click the Path Filters tab Edit Microsoft-Server-ActiveSync or click on Add From the policy dropdown select the policy (Static + config provider name: Block Mode) Click Save  |
3. XNC Configuration on NS
|
Step |
|
| 1 |
Login to NS |
| 2 |
Under Configuration, click XenMobile Select XenMobile 10 Click Get Started
|
| 3 |
Check “Load Balance Microsoft Exchange Servers”, Click Continue |
| 4 |
|
| 5 |
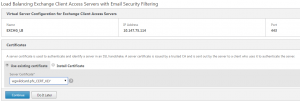
Select the server certificate over which the Exch Active Sync LB VIP will communicate with the exchange server Click Continue |
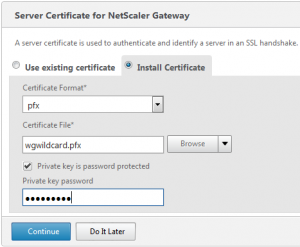
| 6 | If you do not have an existing certificate, select Install Certificate
|
| 7 |
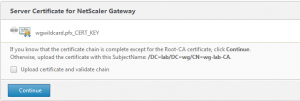
Click continue if the certificate chain is complete, else follow the instruction as given in the screenshot |
| 8 |
Click Add Server to add the Exchange server details (Note: If you already have the Exchange server managed on NS, Click the Add from existing server button) |
| 9 |
|
| 10 |
|
| 11 |
Click Done on the summary page |
| 12 |
With right details provided the Microsoft Exchange Load Balancing with Email Security Filtering status will be Up |
4. XMS – Exchange Active Sync Policy setup
|
Step |
|
| 1 |
Login to the XMS server Click Configure and Device Policies Click Add |
| 2 |
Click Exchange |
| 3 |
Enter a name for this policy (Note: For this use case we are using only iOS) |
| 4 | Enter
|
| 5 |
(Note: Recommend that you create a delivery group to which this policy needs to be
|
5. End User Experience
|
Step |
|
| 1 |
Enroll the iOS device Tap WorxHome and enter the external URL (Ex: rxms.wg.lab) Tap Next |
| 2 |
Tap Yes |
| 3 |
Enter your AD username and password Tap Sign On |
| 4 |
Tap Install for the XenMobile CA profile installtion |
| 5 |
Tap Install for the XenMobile Profile Service |
| 6 |
Tap Trust |
| 7 |
Tap on the Native Mail icon |
| 8 |
A popup window will prompt you to enter the exchange credentails Click OK after you have enter the password |
| 9 |
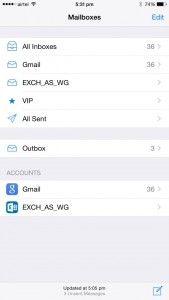
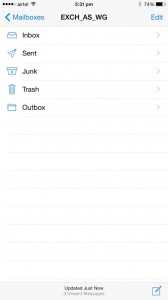
Tap on the mail box which is pushed down from the XMS server (Ex: EXCH_AS_WG) |
| 10 |
Tap on Inbox or Sent items to sync mails from the exchange server |


